


SiriusXM Music for Business
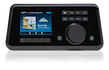
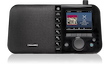
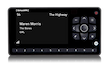
SiriusXM Onyx Plus
Model #: SXPL1V1

All the support you need, all in one place
ANTENNA AIMING
Important Antenna Aiming Tips:
Tip #1: SiriusXM Radio antennas must have a clear view of the sky to operate properly. Buildings, mountains, and other obstructions are likely to reduce the quality of your music signal and cause interruptions in your music stream.
Tip #2: Once you get your antenna aimed and are receiving signal, you may have to tweak your antenna slightly to get the optimum pointing location. Continue tweaking your XM radio antenna direction until you have full signal strength as indicated on your radio display.
Tip #3: Although in many locations it may be possible to receive signals from terrestrial repeaters, it is not recommended to use these signals for a business application. The terrestrial repeaters are intended for cars. Repeater signal strength can vary greatly from day to day as function of many uncontrolled variables. Always use signals directly from the satellites when possible.
Sirius and XM Radios
The satellites that transmit the XM signal are in a geostationary orbit over the equator. Aim your XM antenna due south as noted in the graphic below. Make sure you position your antenna so you have a clear view of the sky.
INSTALLATION
Installing Yourself?
Depending on the structure of your building, installing your antenna may be easier than you think. The steps below outline the installation process and will help you determine whether you’ll want to perform your own installation or have Dynamic Media handle it for you.
Step 1: Determine Outdoor Antenna Location
The antenna only weighs a few ounces and has a footprint of only three square inches. This allows you to install it in many convenient places that full-size music dishes, like those used by business music providers, simply cannot occupy.
Step 2: Run Coaxial Cable from Antenna Location to Radio Location
Connect the antenna to the included antenna extension kit, then run up to 100’ away from the antenna to the business radio’s interior location. Once the antenna extension kit has been run to the business radio’s location, use the included adapter kit to connect the extension kit to the base of the business radio. The graphic below shows how all the parts fit together.
Step 3: Aim Your Antenna
Both XM and SiriusXM radio for business antennas must have a clear view of the sky to operate properly. Buildings, mountains, and other obstructions are likely to reduce the quality of your music signal and cause interruptions in your music stream. Aim the antenna due south.
Step 4: Connect Radio Audio System or Music on Hold Input
Use the included red and white RCA audio cables to connect to your existing system. If your audio system or the music on hold port of your phone system requires a different type of input, please let us know and we’ll ensure the right adapter for the job is included with your order.
Step 5: Call Dynamic Media to Activate Your Service
Once everything is connected your business radio should be able to receive signal, but only allow you to receive programming on the preview station (channel 1 on XM Radio, channel 184 on SiriusXM Radio). Give us a call at 1-800-684-7050 and we’ll get an activation signal out to your radio right away. Leave the business radio powered on and tuned to the preview station and within an hour you and your customers will be enjoying in store music from SiriusXM/XM Radio.
Troubleshooting
| Fault | Probable Cause | Remedy |
| Business radio does not turn on | Power not connected or turned off | Make sure circuit is live. If connecting to a power strip, make sure power strip is switched to the “on” position. Try plugging the radio for business into another outlet in a different part of your office. |
| Display says “Antenna” | Antenna unplugged from Radio | This display means the business radio does not detect an antenna. Make sure antenna is securely connected to your radio for business. If using an antenna extension, make sure all connections between the antenna, inline amplifier, and coax cable are secure. If all connections are secure, check the SMB adapters and make sure the little pin inside the male connector is not bent or missing. If the adapters intact and secure, try to directly connect the antenna to the radio. If when directly connected the “antenna” message is displayed, there is likely a bad antenna or antenna port on the radio. |
| Display says “Acquiring Signal” | Low Antenna Signal |
This display means the radio for business recognizes the antenna, but the antenna cannot receive a signal strong enough to suite the requirements of the radio.
To troubleshoot this problem, follow the steps in the Fault: Low Antenna Signal
|
|
Background Music or Music on Hold Fading In and Out
Low Antenna Signal
|
|
1. Check antenna signal strength through Menu Options on receiver
2. If antenna signal is below the thresholds noted above, continue with the troubleshooting methodology described below.
3. Make sure your antenna is located outside your building (preferable on the roof) and has a clear view of the sky. Any obstructions, including trees, surrounding buildings, etc. may be blocking your antenna signal. A clear view of the sky is mandatory for receiving uninterrupted music radio. For music for business applications, the antenna must be located outside – there are no exceptions to this rule.
4. Make sure your antenna is aimed in the proper direction
5. If you are using an antenna extension kit, make sure you have the inline amplifier is directly connected to the 20 foot lead from the antenna. The ANT port of the amplifier should be pointing toward the antenna, and the REC port of the amplifier should be pointing toward the radio. The antenna extension kit should be installed in the following format:
Antenna > SMB-F adapter > High Gain Amplifier > Coax Cable > SMB-F adapter w/ 3 foot lead > music Receiver
6. Check all physical connections. Make sure all connections between are tight and secure.
7. If antenna signal is below the previously mentioned thresholds, try adjusting the position of antenna to increase signal strength.
8. If you cannot acquire any antenna signal, disconnect antenna extension and directly connect the radio to the antenna. Make sure the antenna is outside and aimed in the proper direction during testing. If the direct connect provides adequate antenna signal, the problem is with the coaxial cable used to extend the antenna. Check for kinks or breakage in cable.
9. If the direct connect does not provide signal, you probably have a defective radio or defective antenna.
|
| No Audio From Radio | Antenna extension | Make sure your radio is receiving adequate antenna signal as described in the fault “Low Antenna Signal.” If your signal is within the thresholds noted therein, commence the following troubleshooting steps.
1. Check the connection between the music receiver and the amplifier. Make sure the mini jack is fully plugged into the radio (this is a common problem). Make sure the RCA cable is securely connected to the amplifier.
2. Check that the speaker wires are connected to the outputs on the back of the amplifier.
3. Make sure your amplifier is turned on and the volume is turned up.
4. If you are using a multi-input amplifier to play in store music or connect to the music on hold port of your phone system, make sure the amplifier is set to the proper input (for example, if the RCA plugs are connected to the “CD” input on the back of your amplifier, make sure you press the CD input selector button on the front of the amplifier).
5. Turn the line-level setting on your music radio to the highest level
6. If your radio is still not playing audio, unplug the wire from the “line out” plug on the radio and plug in a set of headphones. If you hear your background music through the headphones, the problem is with the amplifier or speakers. If no audio comes through the headphones, your probably have a defective business radio.
|
| Display says “Updating” | Signal being received by radio | The term “updating” means the radio for business is receiving the latest encryption code from the XM or siriusXM music. At this point, your business radio is talking to the music and your subscription is being updated. Simply wait a few minutes and your radio will be receiving your music for business subscription package. |
Frequently Asked Questions
What channels are included in the SiriusXM Satellite Business package?
The satellite music package includes 69 SiriusXM music channels programmed and curated by the music experts at SiriusXM. The channels include family-friendly content with no advertisements. Pandora is not included in the satellite package but is available in the streaming package.
How does the SiriusXM Satellite for Business System work?
The music is sent from the SiriusXM satellites floating in the earth’s orbit directly to a small satellite antenna (about the size of an old flip phone) that is connected to your SiriusXM satellite radio. You do not need a computer or internet connection to set up or use the business satellite service.
Once the radio is installed, simply connect it to your audio system using the standard connections on the back of the radio.
Is the SiriusXM Satellite for Business easy to install?
Yes, installing your satellite system is very easy. There is a small satellite antenna about the size of a flip phone that needs to be installed with a clear view of the southern sky. We recommend that the antenna be installed outside for the strongest signal in business applications, but in some cases, indoor installation works fine.
Our Business Satellite package includes everything you need to get your SiriusXM satellite service playing in your business. Our business satellite radio kit consists of the following parts:
- A SiriusXM Satellite Radio
- Home Docking Kit
- Audio cables, power adapter, remote control
- SiriusXM Outdoor Antenna
- 100-Foot Antenna Extension Kit
Do you provide satellite radio installation services, and how much does it cost?
Yes! We provide professional installation services in all U.S. zip codes with our network of 8,500 certified audio technicians.
A basic satellite radio installation for a “standard installation environment” runs about $375. A “standard installation environment” is defined as a single-story building with drop ceilings, roof access, and the location of the antenna within 100 feet of the radio. The technician will run a coax cable from the radio located in the building to a suitable place for the antenna outside the building.